Microsoft PowerPoint
While PowerPoint documents are generally used to present content, students with accessibility requirements might need their own electronic copy to be able to follow a presentation. This guide shows you how to create an accessible PowerPoint document that is compatible with assistive technology, and will also be easier for all students to follow along with during your class or lecture.
After creating an accessible PowerPoint presentation, it’s useful to share it before your session. This allows everyone to come prepared, and it also allows students to access materials with their assistive technology where a digital copy is necessary. Screen reader users need to be able to directly access the content with their own software as presentations shared in Zoom/MS Teams and screenshots cannot be read by a screen reader.
While presenting your PowerPoint, make sure to narrate your slides and any instructions with detailed descriptions to ensure that students who cannot see the slides are able to follow the presentation.
Creating an accessible PowerPoint presentation
Using templates
The simplest way to create an accessible PowerPoint presentation to use templates and in-built styles in PowerPoint. Select a template that suits your purposes, and use the Click to add title and Click to add text sections. Using a template ensures that the look and style of your content will remain consistent throughout the presentation, and it also makes it easier to keep track of reading order for your slides. Templates are available under Templates and Themes in the menu.
Reading order
Reading order is especially important for people who use screen readers and other forms of assistive technology – this refers to the order in which assistive technology will read content from a slide. If you add text boxes to slides yourself, the reading order will be based on the order in which you add the text boxes. This can cause problems if you don’t keep track of reading order when you add text boxes. If you do choose to add your own text boxes, you will need to update the reading order that is found via the Accessibility Checker.
Content structure
Breaking your content into a clear structure can help make it easier for everyone to keep up. Some tips for doing this include:
- Sign-post sections of your presentation by using section slides
- Provide minimal text/content on each slide (it’s clearer to have more slides with less text than fewer slides with more text.
- Add subheadings to your content on your slides
In-built styles
Along with using a template to create your presentation, sticking to the in-built styles in PowerPoint will ensure that all of the content you add to your slides is accessible.
Titles
Create unique, descriptive titles for all of your slides by using the Click to add title option. This will label each of the slides with that title so that screen reader users can navigate through the PowerPoint.
Use unique slide titles (Microsoft Guide). ![]()
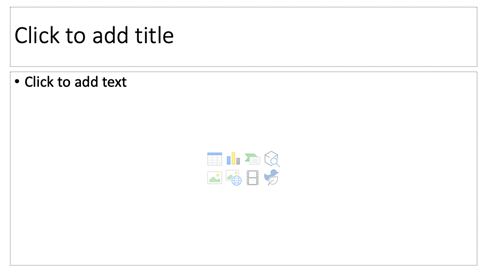
Caption: Where to add your text and title on a slide.
Text and other content
Add content using the Click to add text sections rather than adding text boxes. If you add other content and text boxes, you will need to update the reading order via the Accessibility Checker.
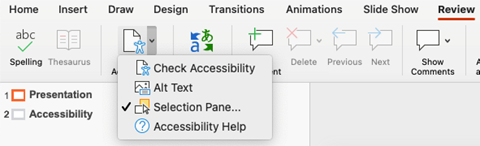
Caption: Accessibility checker dropdown menu.
Formatting
Stick with the templates formatting, however here are some tips if you need to make changes:
- Add line spacing and have plenty of white space
- Use left align text (unless the language of your document is read right to left).
- Avoid fonts smaller than 18pt (if you can’t fit all your text on one slide, then it might be best to create a new slide)
- Choose a sans serif font for your document, such as Arial, Calibri, Century Gothic, Helvetica, Tahoma or Verdana.
Language
- Use clear and concise language
- Explain new discipline-specific terms
- Provide instructions to students in plain English
- When presenting your PowerPoint, narrate what’s on the screen. Don’t assume everyone can see what is happening on your screen, so describe essential visual content.
Alternative text
Any image you add to a PowerPoint presentation should have alternative text (alt text) or be marked as decorative. This provides a text description of what is in the image for users who cannot see it. Adding alt text to your PowerPoint files is important even when you’re specifically creating content that you will present to your class. Some students, especially those who have conditions that affect their vision, will need a copy of your PowerPoint presentation ahead of when you present so that they can follow along. If these students use screen reader software, it is essential for all images to either have alt text or be marked as decorative to ensure that they do not miss out on any important content.
Add alternative text on a Mac or browser:
- Right-click on the image
- Select Edit alternative text
- Delete the automatically generated text (usually it is not very helpful)
- Write short meaningful alternative text, or mark as decorative if the images does not provide useful information that someone who cannot see the image would miss.
- Remember to include alt text or mark shapes and smart art as decorative.
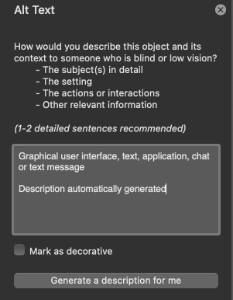
Caption: The alt text pane.
Add alternative text on PC
To add alternative text on a PC:
- Right-click on the image
- Select Format Picture, which will open the Format Picture pane
- Select the Size and Properties option
- Write short meaningful alternative text, in the Title field
Captions and transcripts
If you are using video or audio materials in your presentation, embed versions with captions. If you are not able to include captions, provide a transcript of all dialogue and sound in the notes section of the slide.
Links
Provide link text that is descriptive, so that the link destination makes sense out of context (and include file type and size for downloads after the link). This is particularly important for users who are accessing your content through a screen reader, but will also make the destinations of any links you use clear to all audiences.
You can do this in PowerPoint by editing the display text option.
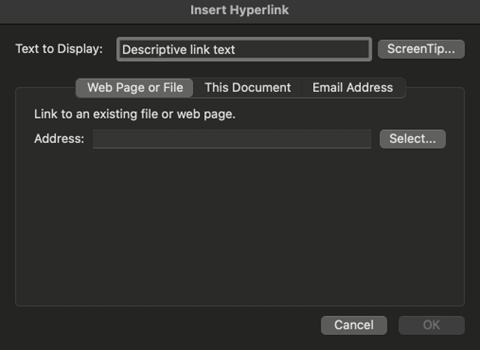
Caption: The Insert Hyperlink pane in PowerPoint on a Mac.
Colour
- For all text, use foreground/background colours that have high contrast. If you’re not sure about the contrast levels of different colours, play it safe by sticking with the default style colours or use the accessibility checker to determine if the text and background colour has high enough contrast.
- Don’t use colour or shape as the only way to identify something in your document. Use text labels or descriptions instead.
Tables
- Avoid using images of tables, and instead generate tables with text directly in PowerPoint.
- Avoid using tables for laying out information that is not tabular information.
- Ensure tables are accessible by having clear column headings and rows that can be found in the Table Design tab.
To add column headings:
- Position the cursor anywhere in a table.
- Select the Table Design tab.
- In the Table Style Options, select the Header Row check box.
- In the table, type the column headings.
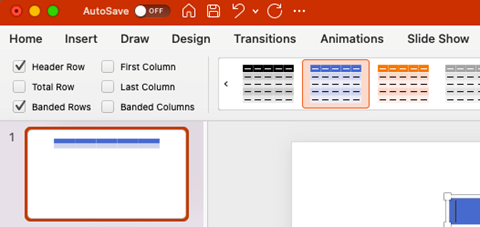
Caption: The Table Design tab.
Understanding the Accessibility Basics
For further information on ensuring your content is more accessible, visit the ADCET Accessibility Basics.
This information was co-authored by Ashley Willcox, Inclusive Practices Support Officer and Rhiannon Hall at LX.lab at the University of Technology Sydney (UTS) ![]() ,
,
(November 2022)